


SLED IT BE! - putting the DIY joinery sled to work
- Anthony
- May 12, 2025
- 1 min read
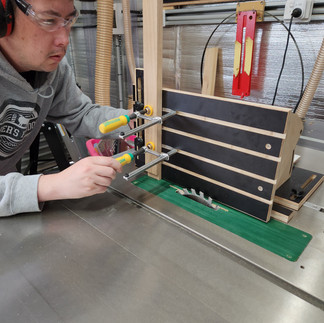
In part one, I went through the process of how I designed and made my custom DIY joinery sled. As promised, in part 2, I'm taking it out for a spin, demonstrating some basic joins and setup tips I've learnt during testing. The joinery sled has really been a bit of a passion project, I've loved and enjoyed the whole process, and it's definitely something I think I'll keep improving and developing for.
A big thank you to Dainer Made who inspired and pushed me along with this one. Many of the features are a direct result of his input. To all those that have already bought plans a big thank you!
If you're interested in the plans, please check out the website.
TIMESTAMPS:
0:00 - Intro
1:00 - Setup step 1 - Setting face angle
1:15 - Setup step 2 - Micro Adjust
1:35 - Setup step 3 - Adjust the mitre bar
3:30 - Setup step 3 - Adjusting the fence
4:47 - First test - the humble lap joint
8:30 - Second test - bridle joint
11:03 - The new fence
11:56 - Third test - finger joint
14:55 - Final thoughts


Comments