


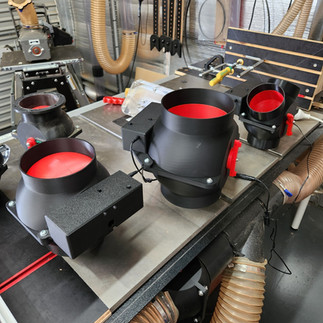
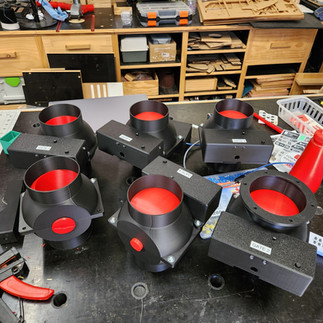
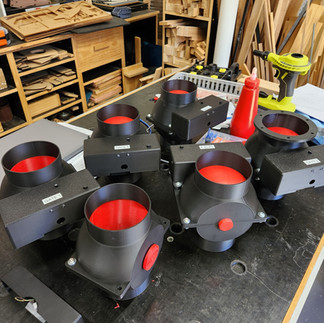
I turned my dust collection system into a SMART SYSTEM | Automatic Blast Gates!
- Anthony
- Mar 16
- 2 min read
I've loved the simple blast gate remote control system I developed last year for my workshop dust collection setup, however it's been nagging at me for some time that we have only been scratching the surface of what's possible.
So many of you have been asking about expanding the project, adding more gates, improving reliability, and more importantly adding some real smarts to the system so the gates and dust collector can operate automatically.
So for the past few months that's exactly what I've been doing. Asking the question “what if?” and going down a fairly deep rabbit hole of electronics, microcontrollers, wireless modules, and automation.
The result is a new version of the system that moves beyond simple remote control and starts laying the foundation for a fully automatic dust collection setup.
In this video I'll walk through the updated design, the new electronics, and how the system works.
This is still very much an evolving project, but what we now have is the basis of what could become a really robust automated dust collection system for the workshop.
As always, I'd love to hear your thoughts, ideas, and suggestions for where the project should go next.
LINKS (NO AFFILIATION): All the links to the hardware I used in this project:
Distribution Board: https://www.amazon.com.au/dp/B0F93MDL8M?ref=ppx_yo2ov_dt_b_fed_asin_title DC Adapter: https://www.amazon.com.au/dp/B07MB1FFLY?ref=ppx_yo2ov_dt_b_fed_asin_title
DC Barrel Plug: https://www.amazon.com.au/dp/B0C4JJ2HB4?ref=ppx_yo2ov_dt_b_fed_asin_title&th=1
Buck Converter: https://www.amazon.com.au/dp/B0DS2JCSTR?ref=ppx_yo2ov_dt_b_fed_asin_title&th=1 Arduino Nano: https://www.amazon.com.au/dp/B0D5LYFRQP?ref=ppx_yo2ov_dt_b_fed_asin_title
Arduino Nano Terminal Shield: https://www.amazon.com.au/dp/B0CXGZ6D2T?ref=ppx_yo2ov_dt_b_fed_asin_title
Standoff Kit: https://www.amazon.com.au/dp/B09V1753GB?ref=ppx_yo2ov_dt_b_fed_asin_title
Green 5V LED: https://www.amazon.com.au/dp/B0DSC3MZBJ?ref=ppx_yo2ov_dt_b_fed_asin_title&th=1
Red 5V LED: https://www.amazon.com.au/dp/B0DSC47C7V?ref=ppx_yo2ov_dt_b_fed_asin_title&th=1
Terminal Block: https://www.amazon.com.au/dp/B0B9BRLVCK?ref=ppx_yo2ov_dt_b_fed_asin_title&th=1 Wires: https://www.amazon.com.au/dp/B0DZC5F1WX?ref=ppx_yo2ov_dt_b_fed_asin_title&th=1
Wireless Transmitter & Receiver: https://www.aliexpress.com/item/32820610184.html Mini terminal: https://www.aliexpress.com/item/1005010437250629.html
5.1KG Servo Motor: https://core-electronics.com.au/catalog/product/view/sku/SER0020 AC
Current Sensor Kit: https://core-electronics.com.au/gravity-analog-ac-current-sensor.html
Power Switch: https://au.store.bambulab.com/products/power-switch-module-with-2pin-xh2-54-connector-1pcs Momentary Button: https://au.store.bambulab.com/products/momentary-button-module-with-2pin-sh1-0-connector-1pcs
Remote Control: https://www.ebay.com.au/itm/355561592747 Wireless Power Adapter: https://www.ebay.com.au/itm/393014936624
ARDUINO CODING RESOURCES:
Mark Rober: https://www.youtube.com/watch?v=yi29dbPnu28
How to control a servo motor with Arduino: https://youtu.be/QbgTl6VSA9Y
Learn Documentation with Arduino directly: https://docs.arduino.cc/learn/ Arduino
Workshop for Beginners: https://core-electronics.com.au/courses/arduino-workshop-for-beginners
TIMESTAMPS:
0:00 - Intro
1:07 - Limitations of the old system
2:12 - Setting goals and criteria
3:13 - Requirement number 1 - Remote control matters
3:49 - Requirement number 2 - Open gates when a tool is turned on
4:25 - Requirement number 3 - Control the dust collector
4:44 - Requirement number 4 - Turn the dust collector off after a delay
5:26 - A basic system over view - Module 1 & 2 7:46 - 3 months later
9:01 - Disclaimer
9:36 - Building the servo module
14:32 - Talking about wireless
16:46 - Talking about micro controllers
20:39 - Building the power detection module
23:55 - Let's talk about programming
29:37 - Installing the new system into the workshop
30:04 - How are the original gates holding up?
32:04 - Installing the power detection system
34:12 - Integration testing 39:51 - So what now?
41:36 - Costs


Comments